How to sync your MailSafi Calendar on your Outlook for Desktop
This is a step-by-step guide on how to connect your desktop Outlook Calendar app to your MailSafi calendar. The first step in setting up any third-party app to work with the MailSafi calendar is creating a CalDAV connection. If you haven’t already done this, click here for a guide on creating a CalDAV connection.
1. Install Outlook Synchronizer
Because Microsoft Outlook doesn’t have native support for CalDAV, you will need to download and install an add-on called
Outlook CalDAV Synchronizer. You can download it from here.
Important note: The Synchronizer add-on might not be compatible with all versions of Microsoft Outlook. It is therefore important to check the Synchronizer website for the compatibility information.
After downloading the setup program, run it and follow the installation wizard. If your Outlook is running, you'll need to relaunch it after the Synchronizer setup is finished.
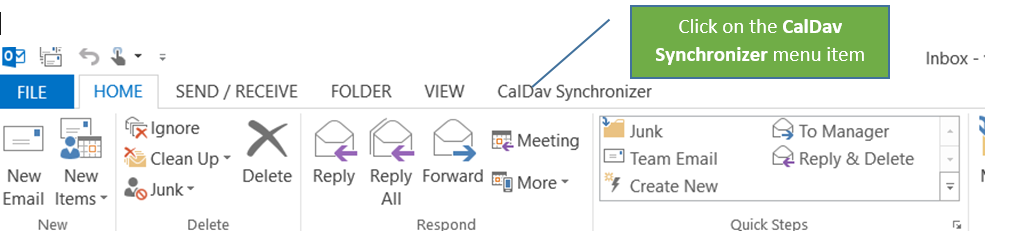
When you re-launch Outlook, you'll see a new menu item on top: CalDav Synchronizer. Click on it to begin the calendar setup process.
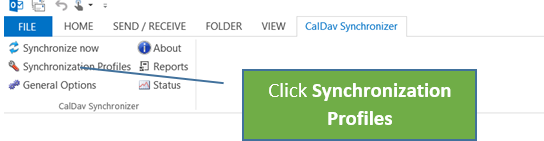
2. Click Synchronization Profiles on the CalDav Synchronizer tab.
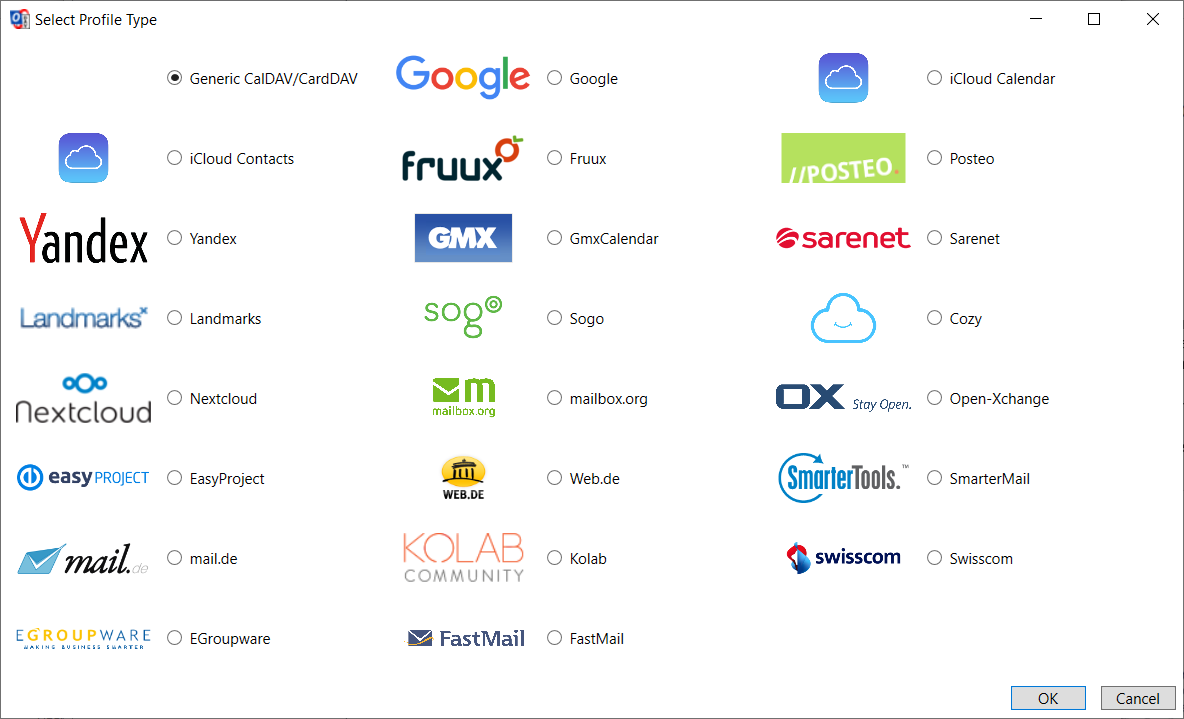
3. Click the + button at the top of the Options dialog box to add a new profile.
4. On the Select Profile Type window, choose Generic CalDAV/CardDAV and click OK.
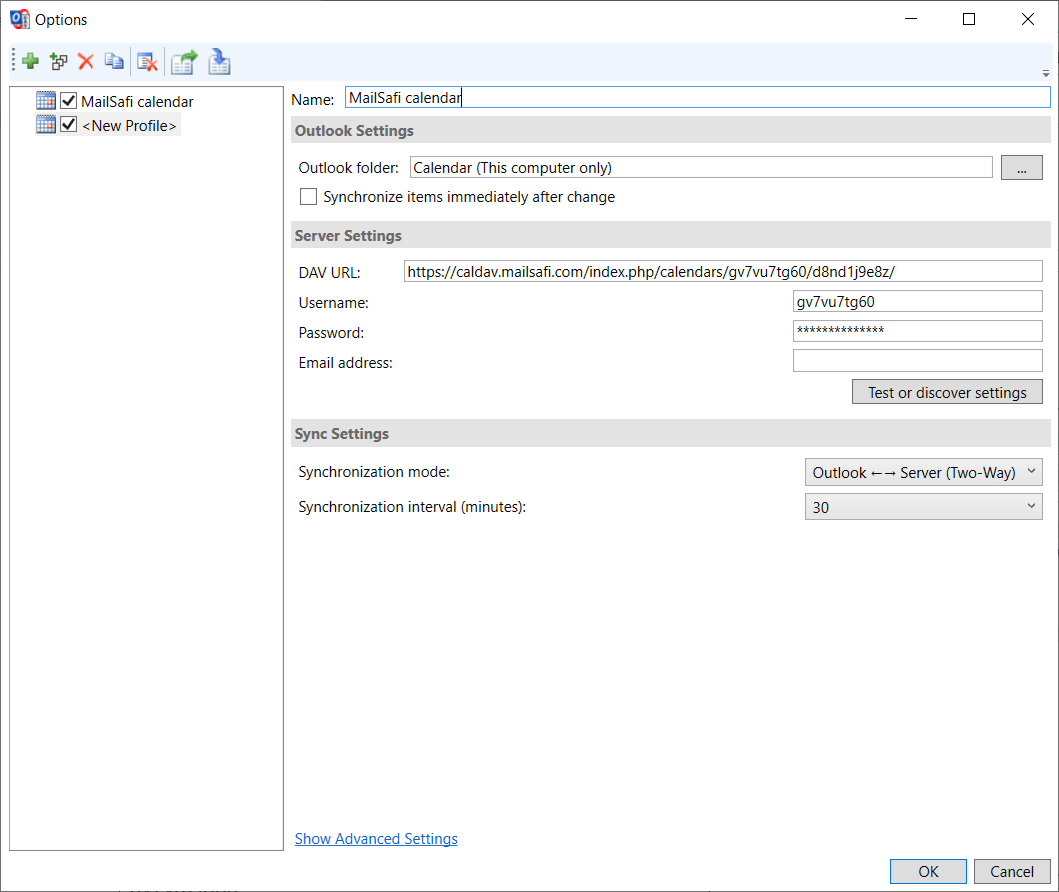
5. Type the calendar details
Type a name for the calendar
Outlook folder: Click on the ... button and select Calendar.
DAV URL: type the Alternate URL that you were given when creating the MailSafi CalDAV connection (make sure the URL ends with a forward slash) e.g., https://caldav.mailsafi.com/index.php/calendars/gv7vu7tg60/d8nd1j9e8z/
Username: type the Email ID of the MailSafi CalDAV connection you chose when creating the connection, e.g., gv7vu7tg60
Password: type the password of the MailSafi CalDAV connection you used when creating the connection
6. Click Show Advanced Settings.
Select Network Settings on the left sidebar.
Uncheck the option "Use preemptive authentication".
Make sure all the network settings are same as in the screenshot.
Click OK.

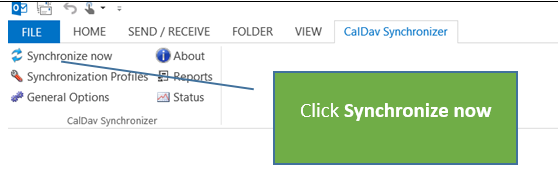
7. Back on the main screen, click Synchronize now. If the connection was successful, you should see your MailSafi calendar events in the calendar grid.
Here’s a step-by-step guide of how to sync your MailSafi Calendar to your iOS device.