Workaround for Error "This email address has already been added." In Microsoft Outlook 2016/365 and Above
Important note: Only works for Windows 7/8.1/10 machines
When setting up your Outlook so that you can migrate from one email service provider to MailSafi, you may be receiving the error message "This email address has already been added." This error typically occurs if you are trying to add (create) a new email account on Outlook which shares the same name as an existing account on your Outlook.
Here’s a step by step guide on how to resolve this issue.
1. Ensure that Outlook is closed before you begin.
2. Press the Windows key on your keyboard.

3. Type in the Search bar that appears Control Panel. Click on Control Panel once it appears.
4. Type mail in the Search bar on the top right-hand corner, then click on the Mail icon that appears.
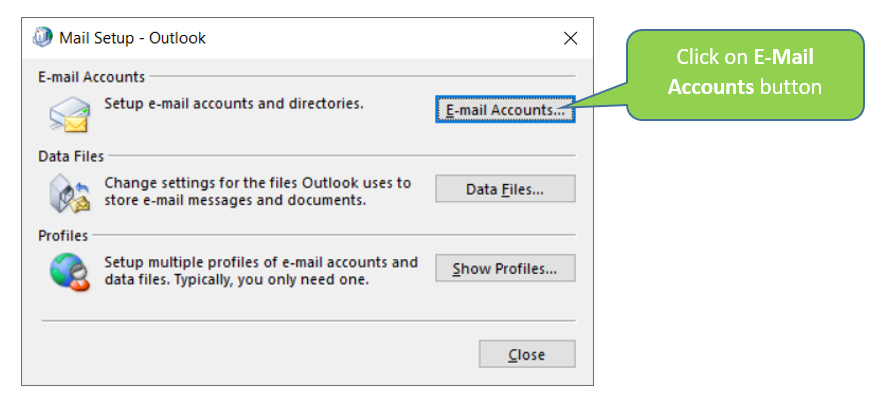
5. A Mail Setup - Outlook window should appear. In the Mail Setup window, click on the E-mail Accounts… button.
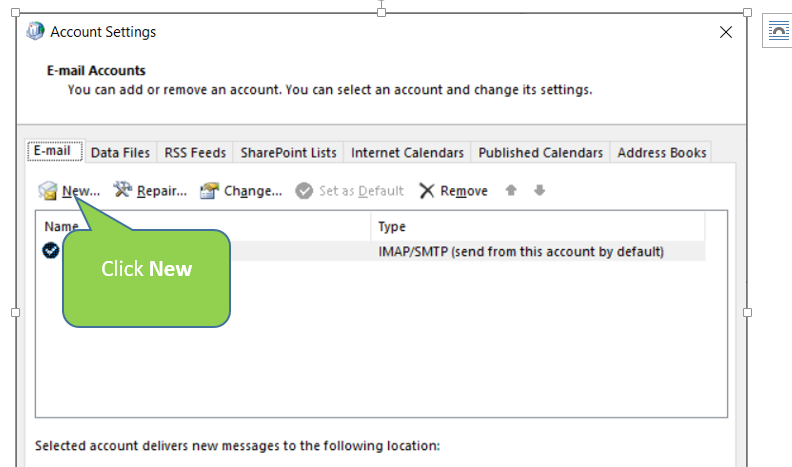
6. In the Account Settings Window that appears, click New.
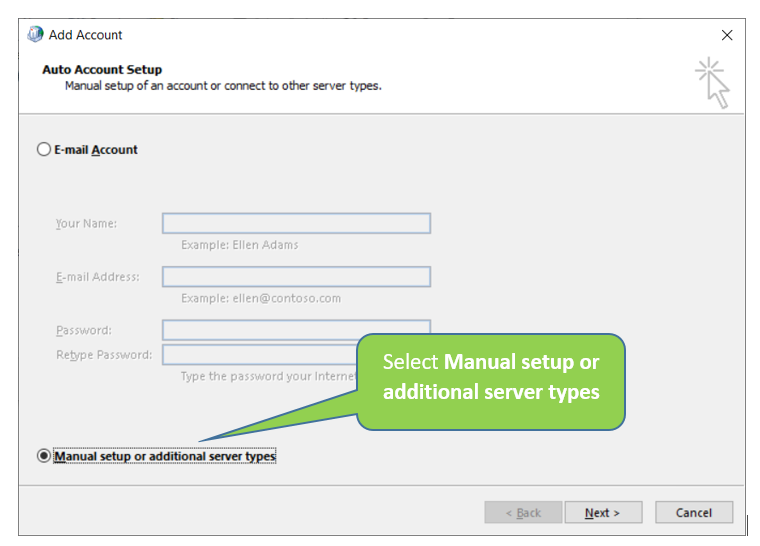
7. In the Add Accounts window that pops up, select Manual setup or additional server types then click Next.
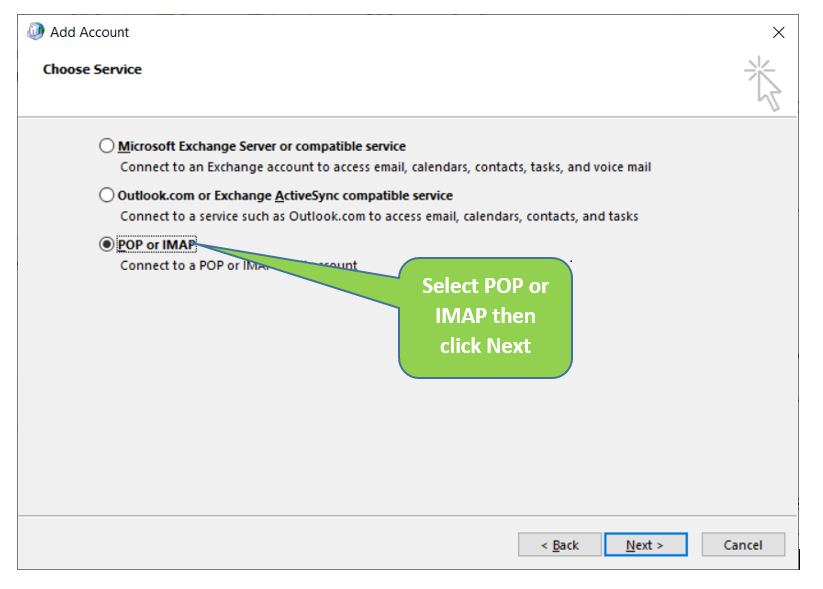
8. Select POP or IMAP and click Next.
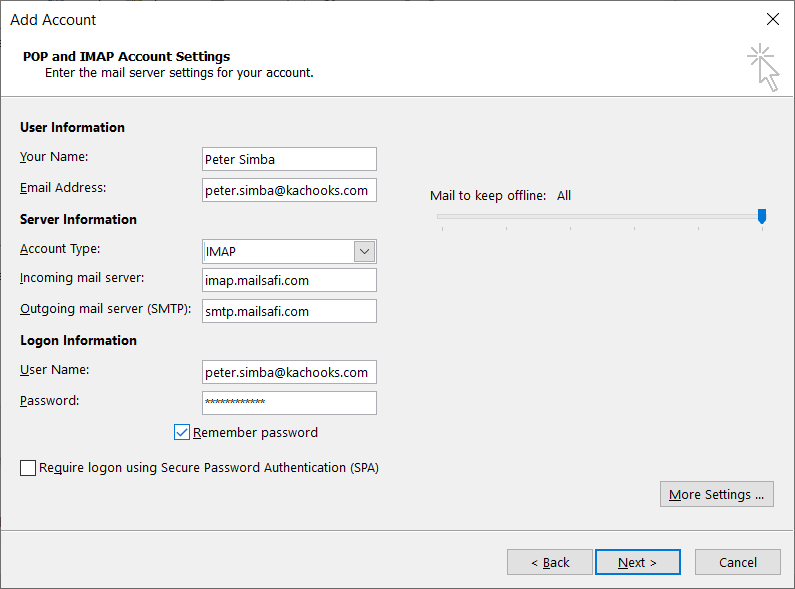
9. Fill in your POP and IMAP account settings as shown in this example here (replace Peter Simba and peter.simba@kachooks.com with your preferred details where Peter Simba is your name and kachooks.com is your organization’s email domain).
Optional: When entering your password, we recommend that you use an app-specific password. You can generate one by logging onto your webmail and following these steps here https://www.mailsafi.com/using-app-specific-passwords
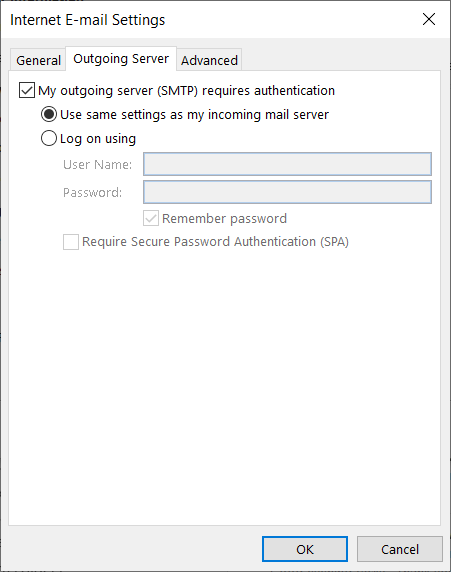
10. Click on More Settings and then choose the Outgoing Server Tab and choose option to use same settings as incoming server as shown here.
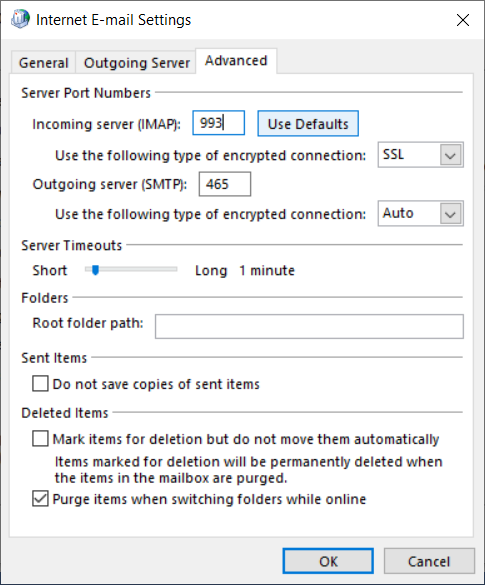
11. Click on the Advanced Tab and enter incoming server for either POP3:pop.mailsafi.com port 995 or IMAP:imap.mailsafi.com port 993 with SSL (or SSL/TLS) as encrypted connection and outgoing server 465 or 587 with Auto as encrypted connection as shown here and then click OK.
12. Click Next and wait for your setup to complete.
For any other MailSafi Email setup issues, and if you are an existing customer of MailSafi, please write to us on support@mailsafi.com and our support team will be in touch with you for further assistance.