Setting up your Android Mobile Device for MailSafi Email
Below is a step by step guide of how to set up your android device for MailSafi Email. We use an example user peter.simba@kachooks.com in our guide below.
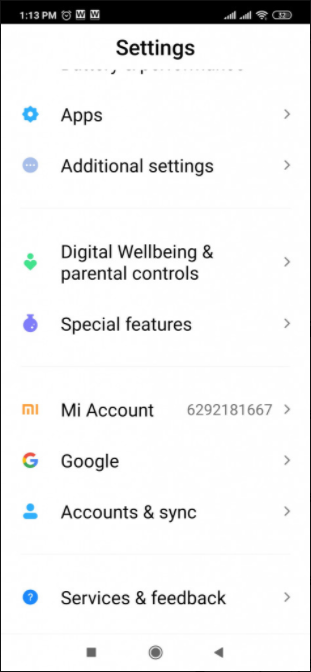
Step 1. Click on Settings.
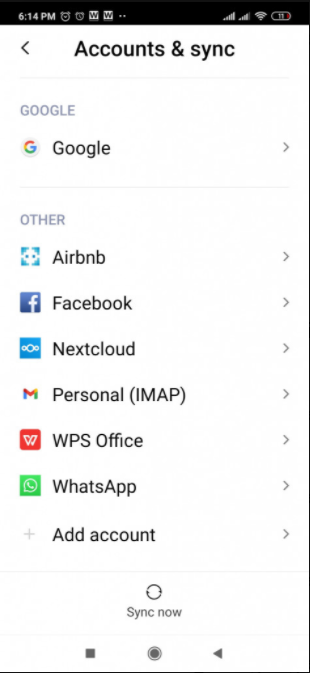
Step 2. Click on Accounts & Sync.
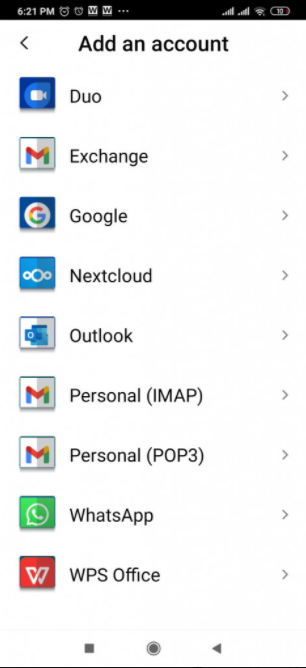
Step 3. Click on Add Account.
Step 4. Click on Personal (IMAP)
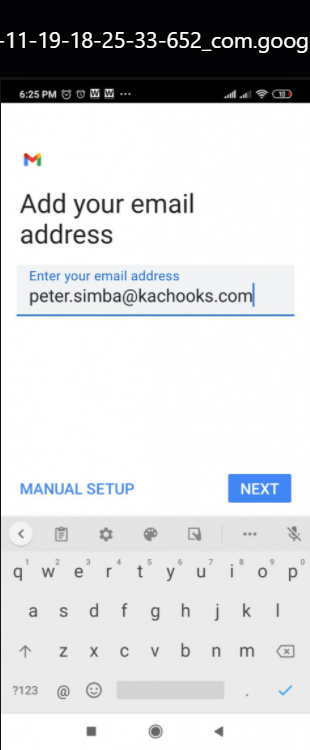
Step 5. Add your email address. Then click MANUAL SETUP.
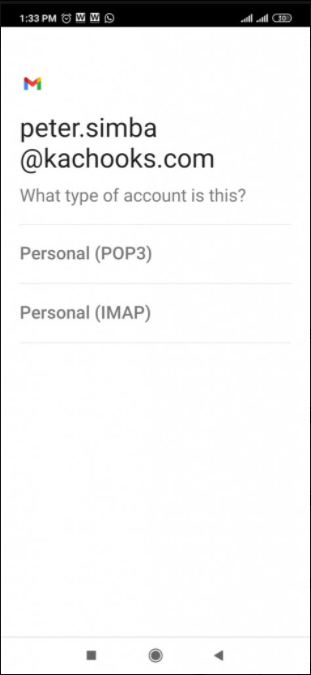
Step 6. What type of account is this? Select Personal IMAP.
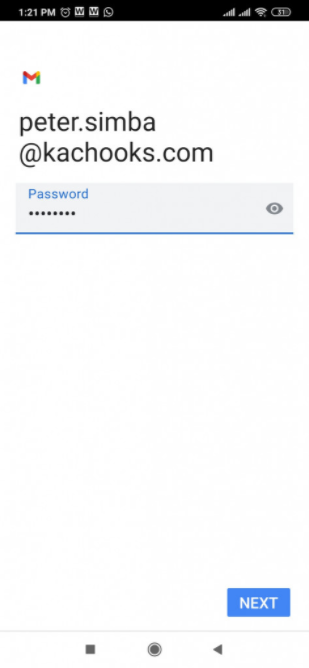
Step 7. Enter email password and click NEXT.
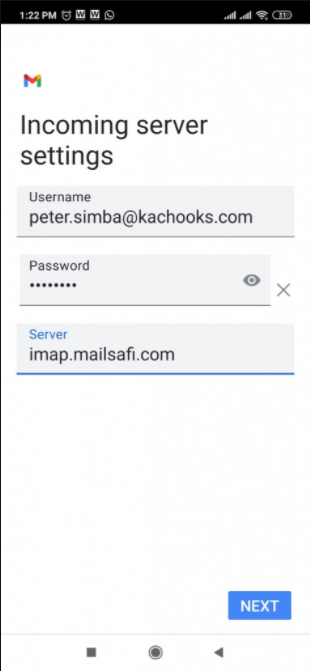
Step 8. Enter incoming server settings as shown below and click NEXT.
Username: peter.simba@kachooks.com
Password: [enter email password]
Server: imap.mailsafi.com
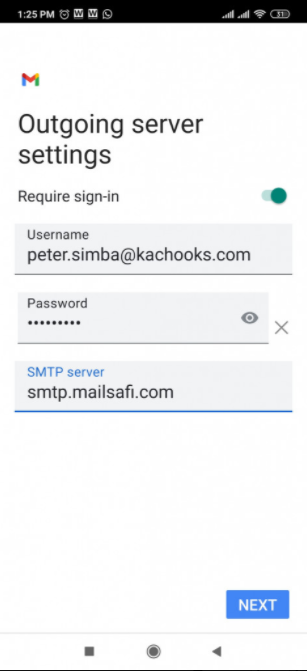
Step 9. Enter outgoing server settings as shown below and click NEXT.
Username: peter.simba@kachooks.com
Password: [enter email password]
Server: smtp.mailsafi.com
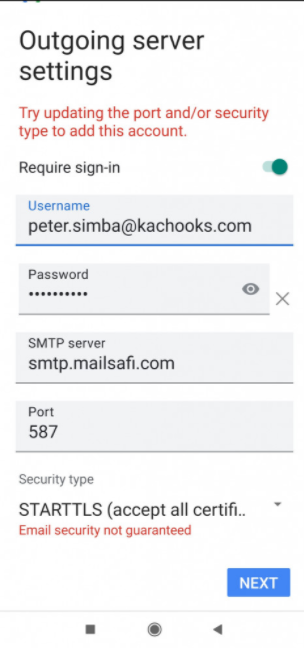
Step 10. If additional security settings must be configured, set
Port 587 OR Port 465
Security Type: STARTTLS (accept all certificates)
Then click NEXT to complete the setup.
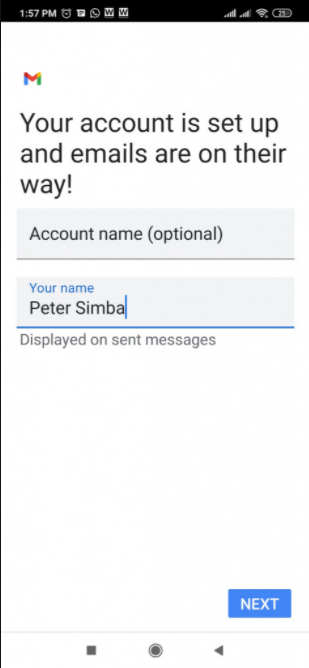
Step 11. Your account is set up. Enter your display name and click NEXT. You can now open your email client to start receiving your emails.